Our Drywall Repair Process in Las Vegas, NV
How We Repair Drywall in Las Vegas
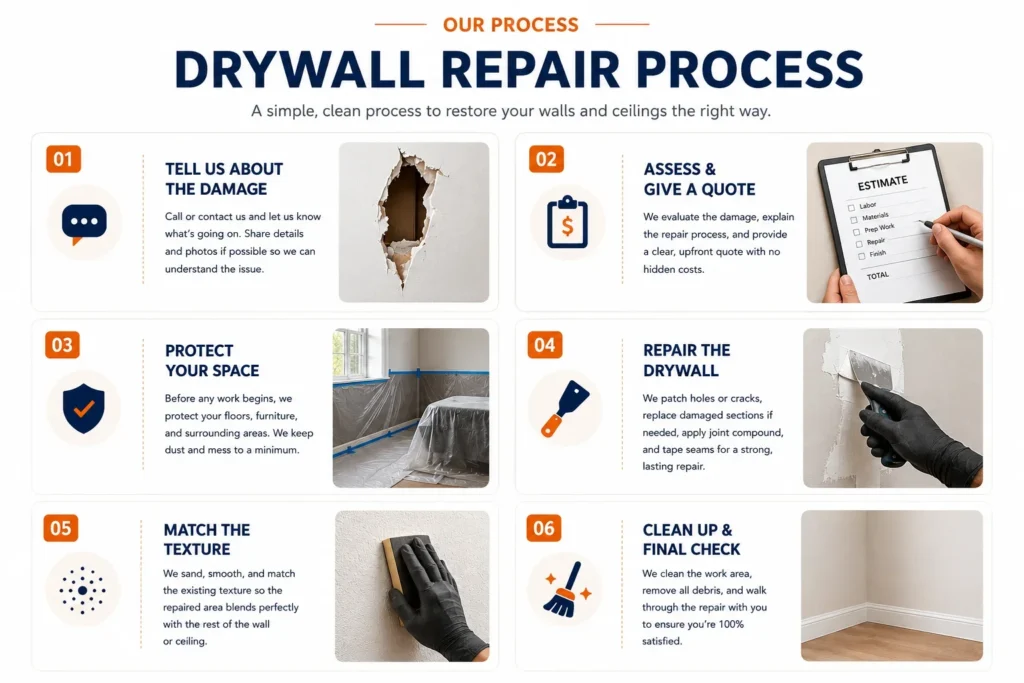
No mystery, no upsells, no vague “we’ll take a look.” Here’s exactly what happens from the moment you call to the moment your wall looks untouched again. Every step below is the same process we follow on every job, no matter how small or large the damage is. We don’t skip steps to save time, and we don’t guess at a price once we’re already inside your home. From the first phone call to the final texture match, you’ll know exactly what’s happening and why. This is the process that turns a damaged wall into one you can’t tell was ever touched.
You Call Us
Tell us what’s going on. A hole, a crack, a water stain, doesn’t matter how small or how big. We’ll ask a few quick questions about the size, the location, and what caused it, if you know.
We Give You a Firm Quote
Based on what you describe, we give you a real price over the phone, not a vague range. If you can text a photo after the call, we can tighten that quote up even further before we ever step inside.
We Protect Your Space
Before any patching starts, we lay down floor coverings and protect nearby furniture and flooring from dust and debris. A drywall repair shouldn’t leave you with a bigger cleanup job than the damage itself.
We Repair It Properly
This is the step most patch jobs skip corners on. We back holes properly, trace cracks to their real cause, and rebuild water damage instead of covering it, then mud and tape every seam until it disappears.
We Match Your Texture
This is the step that decides whether a repair is invisible or obvious. Knockdown, orange peel, smooth, or hand troweled, we match your exact texture before any paint goes on. Paint can’t fix a texture mismatch, it can only make it more obvious.
We Clean Up and Walk You Through It
Once the repair is done, we clean up the work area completely, floor coverings, dust, everything. Before we leave, we’ll point out the finished repair so you can see the texture match yourself, not just take our word for it.
What You Get With Every Repair
Every job, no matter the size, gets the same standard. That’s what separates a repair that holds up from one that doesn’t. These are the four things we don’t skip on any visit, whether it’s a single nail hole or a full wall.
Will you protect my floors and furniture?
Yes. We protect nearby floors, furniture, and surfaces before starting work and clean the area after the repair.
Proper Surface Preparation
We prepare the damaged area before patching to help create a strong, smooth repair.
Clean, Controlled Work
We protect nearby floors and furniture and keep the repair area organized throughout the job.
Texture Matching
We sand and finish the repaired area to help it blend with the surrounding wall or ceiling texture.
Final Inspection & Cleanup
We check the completed repair, clean the work area, and make sure the surface is ready for painting or final finishing.
See Our Drywall Repair Process
Every drywall problem is different. Our repair photos show examples of damaged ceilings, holes, and surfaces before and during the repair process.
From damaged drywall to a clean, finished surface, we focus on the details that make the repair blend in.
Drywall Repair Process Questions, Answered
Do I need to move furniture before you arrive? Small items near the repair area, yes. Anything larger, we can work around or help move ourselves.
MV Drywall Repair Service has been following this process for 7 years in Las Vegas. Every repair is done by owner Daniel Carter personally — not a subcontractor. We are licensed and insured in Nevada. Call (725) 337-6885 for a free written estimate.